
How to Draw an Eye Step by Step (Realistic Pencil Guide)
Draw a realistic eye in pencil step by step: the almond shape, iris and pupil under the lid, lid thickness and crease, then shading, lashes and brow.
By Ayoub Farid · · 3 min read
The eye is one of the most searched drawing lessons and one of the most rewarding. It's also where beginners make the most predictable mistakes: lemon-shaped outlines, a full circle for the iris, lashes like a comb. Here's how to draw it properly, in the order Graphite's Realistic eyes track uses.
Part 1: Eye shape
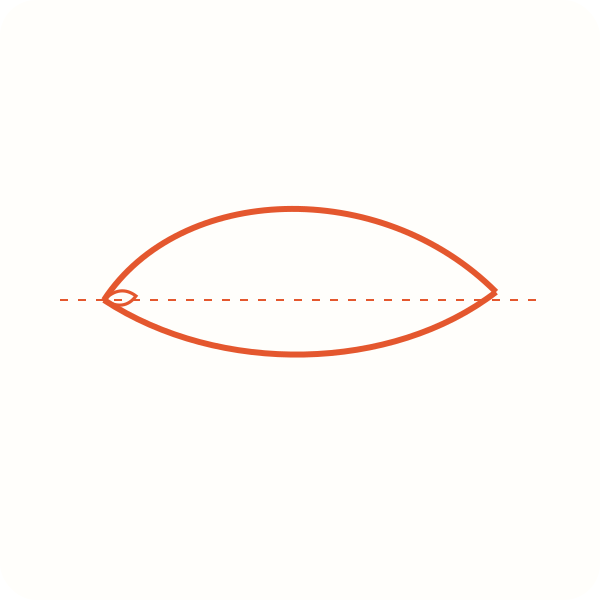
Step 1: The almond shape
Draw a light horizontal guideline. Draw the upper lid as a higher, more curved arc and the lower lid as a flatter arc, meeting at both corners. Add the small tear duct on the inner corner.
- The upper lid curves more than the lower one.
- The highest point of the upper lid is a bit toward the inner corner.
Step 2: Iris and pupil
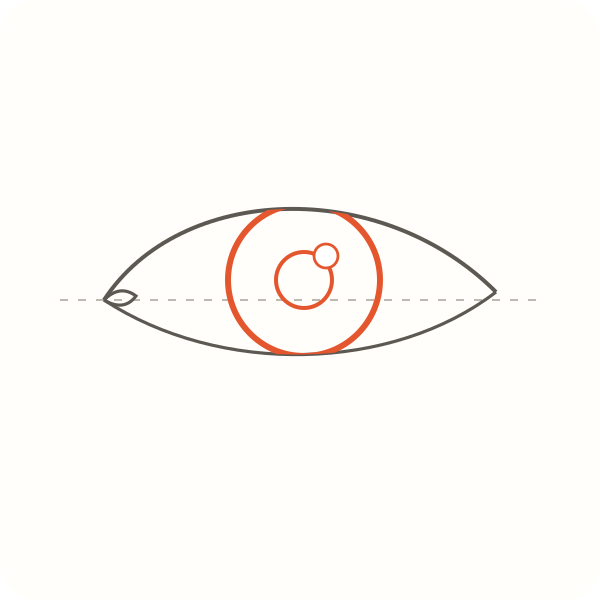
Draw a circle for the iris, partly hidden under the upper lid and just touching the lower lid. Add the round pupil in the center and a small highlight circle.
- The upper lid covers the top of the iris, so you never see the full circle.
- Leave the highlight white for the whole drawing.
Step 3: Lids and crease
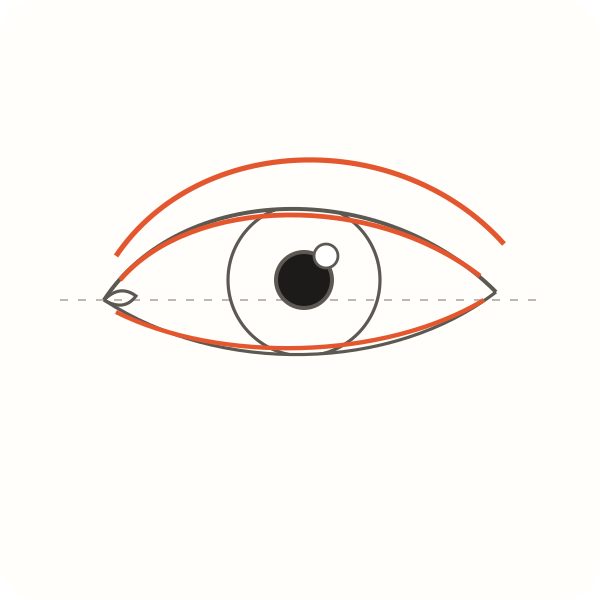
Give the lids thickness: a second line just inside the upper lid and the lower lid's waterline. Add the crease above, following the upper lid's curve.
- The lid thickness catches light: keep it lighter.
- The crease is softer than the lid line.
Part 2: Shading the eye
The next steps (shade the iris, shade the white of the eye, then lashes and brow) are covered in detail in how to shade an eye. In short:
- Iris: darker ring around the edge, black pupil, thin lines radiating out, and the shadow of the upper lid across the top.
- The white isn't white: shade the eyeball lightly near the corners and under the lid so it looks round.
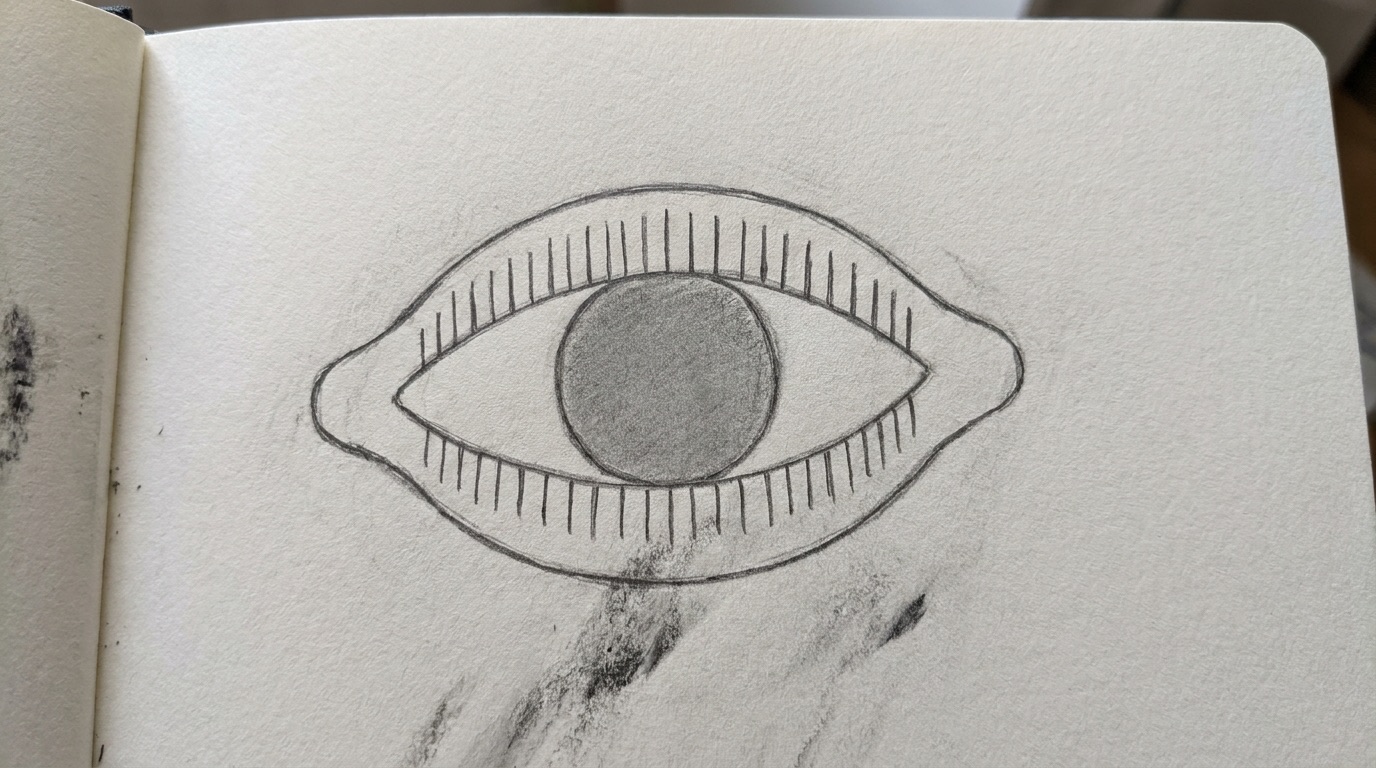
- Lashes and brow: curved lashes that clump, shorter lower lashes, brow strokes in the direction the hair grows.
Before and after
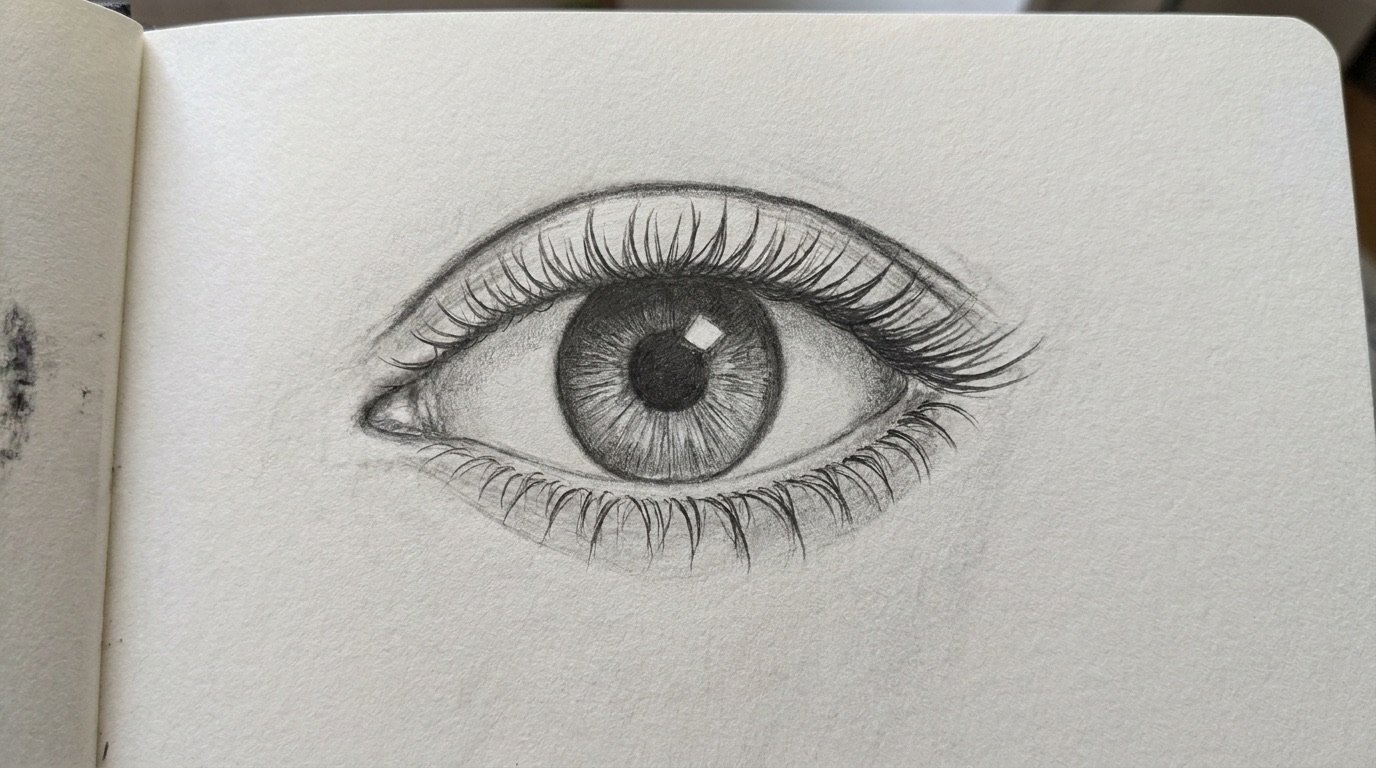
The 5 most common eye mistakes
| Mistake | Fix |
|---|---|
| Symmetrical lemon shape | Upper lid higher and more curved; corners different |
| Full circle iris | Tuck the top under the upper lid |
| No lid thickness | Add the lid line and waterline |
| Lashes in an even row | Curve them, vary length, let them clump |
| Highlight shaded over | Plan it and keep it white |
Frequently asked questions
What is the easiest way to draw an eye?
Start with a horizontal guideline and a simple almond, then place the iris under the upper lid. Build detail in steps, as above.
How do I make an eye look realistic?
Overlap the iris with the lid, shade the white of the eye, keep a sharp highlight, and shade the iris darker at the top from the lid's shadow.
What should I learn before drawing eyes?
Shading a sphere. The eyeball is a sphere and shades the same way.
Related: how to draw an iris, eyelashes, eyebrows, face proportions.